
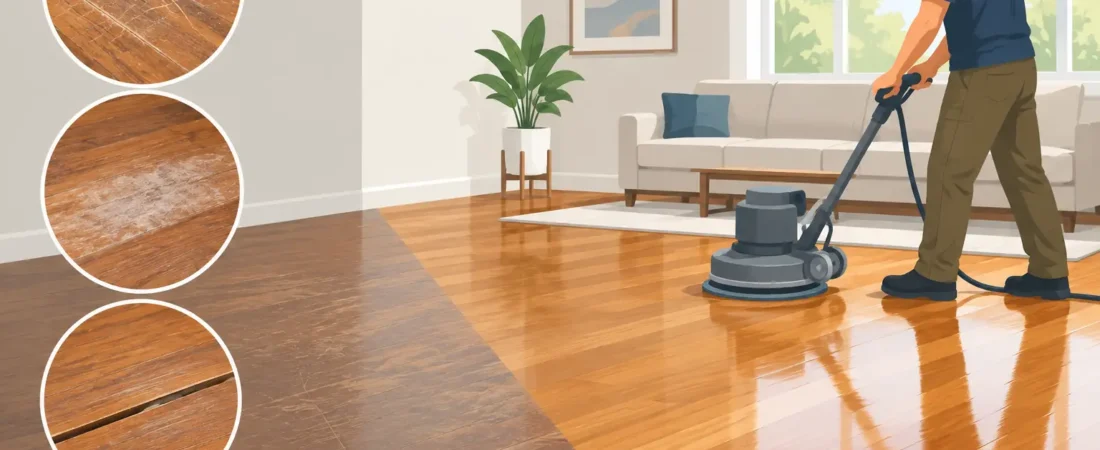
A hardwood floor can look tired long before it has reached the end of its life. The finish may be dull in the hall, scratched near the kitchen, or worn away where the family dog makes the same turn every day. Hardwood refinishing Nashua homeowners schedule at the right time can bring that floor back to life without the cost and disruption of a full replacement.
The key is knowing what you are looking at. Some floors need a professional cleaning and a new maintenance coat. Others need sanding, repair work, and a completely new finish. A close look at the wood, not just the surface shine, helps you make the right call.
When Hardwood Refinishing in Nashua Makes Sense
Everyday scuffs are part of owning a wood floor. A few shallow marks that only affect the clear finish are usually cosmetic. But widespread scratching, gray traffic paths, bare spots, and a finish that no longer cleans up well are stronger signs that refinishing should be considered.
Look closely at the areas near exterior doors, sinks, kitchens, and pet bowls. If the wood has darkened, feels rough, or has gaps where moisture has worked into the boards, waiting can make the repair more involved. A damaged finish allows water, dirt, and grit to reach the wood itself. What begins as a worn-looking walkway can become stained boards or cupped edges.
Refinishing is often a smart choice when the boards are still solid and the floor has enough usable wood above the tongue-and-groove connection. Most traditional solid hardwood floors can be sanded more than once during their lifetime, although the exact number depends on the species, board thickness, and previous work. Engineered hardwood is different. Some engineered floors have a wear layer thick enough for careful refinishing, while others do not. That is why an in-home assessment matters before anyone promises a particular result.
What a Professional Refinish Actually Does
A proper refinish is more than putting a fresh coat of polyurethane over an old floor. The work starts with preparation. Rooms need to be cleared, transitions protected, and problem areas identified before sanding begins. Loose boards, protruding fasteners, damaged planks, and gaps may need attention first.
Sanding removes the worn finish and levels normal surface wear so the floor can accept stain and finish evenly. It is detailed work. Sand too aggressively and the floor loses unnecessary material. Sand too lightly and old finish, scratches, or uneven color can remain visible. Edges, corners, stair treads, and areas beneath radiators or along trim call for the same patience as the open center of the room.
After sanding, the floor is cleaned thoroughly before stain or finish is applied. Homeowners may choose to keep the natural tone of the wood, warm it with a traditional stain, or change the color more dramatically. The best choice depends on the species and condition of the existing floor. Oak generally accepts stain predictably, for example, while maple and birch can show uneven color without the right preparation and product selection.
The final finish protects the floor from daily life. Water-based finishes typically dry faster, have less odor, and keep the wood closer to its natural color. Oil-based finishes can add warmth and depth, though they generally take longer to cure and may amber over time. Neither option is automatically better. A busy household, a tight project schedule, desired color, and room use should all guide the decision.
Repairs Should Come Before the Finish
Refinishing can make an older floor look remarkably renewed, but it does not erase structural problems. Buckling, severe cupping, soft areas, recurring moisture stains, or boards that move underfoot need to be addressed at the source. Otherwise, a beautiful new finish may be short-lived.
Water damage is a common example. A one-time spill caught quickly may leave only a minor mark. A slow dishwasher leak, wet basement condition, or repeated moisture from an exterior door can affect the subfloor and cause boards to lift, separate, or discolor. In those cases, damaged boards may need replacement before the surrounding floor is blended and refinished.
Board replacement is also useful for deep pet stains, burns, broken edges, and previous patchwork that does not match the original flooring. The goal is not simply to fill a hole. It is to install sound material, prepare it correctly, and create a repair that fits naturally with the rest of the floor after finishing.
Choosing Color Without Regretting It Later
A floor color can change the feel of an entire room, so samples are worth the extra time. Stain viewed on a display board will not always look the same on your own floor. Existing wood species, grain pattern, age, prior sun exposure, and lighting all affect the final appearance.
Darker stains can create a rich, formal look, but they tend to show dust, pet hair, and light scratches more readily. Very light or natural finishes can make a room feel open and often hide dust better, though they may still show dark marks and high-traffic wear. Medium tones remain popular because they work with many cabinet colors and furnishings while being forgiving in everyday use.
If you are refinishing only one room, consider how it connects to nearby floors. An exact match may not be possible when adjoining rooms have aged differently or were installed at different times. A skilled contractor can explain whether a close blend, a deliberate transition, or refinishing connected areas together will produce the better visual result.
What to Expect During the Project
Homeowners understandably worry about dust, odor, and how long they will be out of their rooms. The details depend on the floor size, repair needs, chosen products, weather, and drying conditions. Most projects require furniture to be removed from the work area, and families should plan to keep foot traffic off the floor while it dries and cures.
Professional dust-containment equipment makes a major difference, but sanding is still construction work. A careful crew protects nearby areas, keeps the job site orderly, and cleans up thoroughly as the work progresses. Ask how the contractor handles dust control, ventilation, shoe molding, door thresholds, and access to the home during the job. Clear expectations prevent surprises.
It is also wise to ask when furniture, rugs, and pets can return. A floor may feel dry to the touch before the finish has fully cured. Placing heavy furniture or area rugs too early can mark the surface or interfere with curing. Your contractor should give specific guidance based on the finish used, rather than a one-size-fits-all answer.
How to Protect a Newly Refinished Floor
The first weeks matter, but long-term care is simple when it becomes routine. Use felt pads under furniture, place quality mats at entry doors, and avoid dragging chairs or appliances across the floor. Sweep or vacuum with a hardwood-safe attachment often enough to remove grit, since tiny particles act like sandpaper under shoes and paws.
Use a cleaner made for finished hardwood and follow its directions. Avoid soaking the floor, steam mops, waxes, and household cleaners that leave residue or damage the finish. If water spills, wipe it up promptly. In New England, maintaining reasonable indoor humidity through changing seasons also helps reduce movement between boards.
A maintenance coat may eventually be appropriate before the finish wears through to bare wood. This can extend the time between full sanding projects, but it only works when the existing finish is clean, sound, and compatible with the new coating. Once the finish is gone in traffic areas, sanding and refinishing are usually the more dependable solution.
Get Clear Answers Before You Commit
The best estimate starts with an inspection of the actual floor. Photographs can be helpful, but they cannot always reveal prior sanding, hidden moisture issues, loose boards, or the true condition of an engineered wear layer. An experienced flooring professional should be willing to explain what the floor needs, what can be repaired, and where the limits are.
Diorio Flooring brings more than 40 years of hands-on trade experience to residential hardwood restoration throughout the Nashua area. The work is approached with respect for the home, careful preparation, clean workmanship, and attention to the details that make a finished floor look right from every angle.
If your hardwood has lost its shine, do not assume replacement is the only answer. A free in-home quote can give you a practical path forward, whether that means refinishing, repairing a few damaged boards, or planning a larger flooring update that fits your home and budget.