
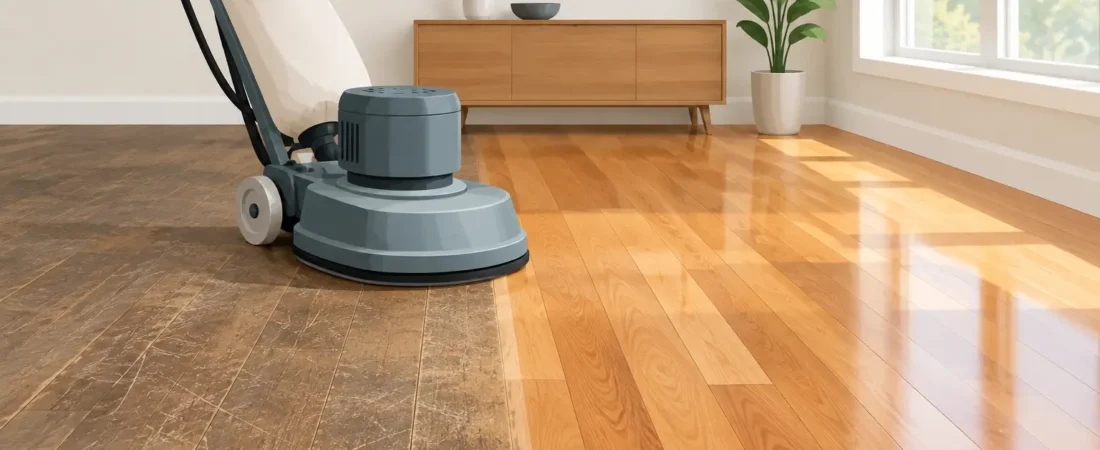
A hardwood floor can look beyond saving long before it actually is. Scuffs at the entryway, dull traffic lanes in the kitchen, pet scratches in the living room, and an old amber finish can make a room feel tired. In many cases, professional floor sanding removes that worn surface and reveals the solid wood underneath, ready for a fresh finish that fits your home.
The key is knowing what sanding can correct, when a repair is needed first, and why careful preparation matters as much as the final coat of finish.
What Floor Sanding Actually Does
Floor sanding removes a thin layer of wood from the surface of an existing hardwood floor. This takes away most surface scratches, embedded dirt, finish wear, minor discoloration, and unevenness caused by years of daily use. After sanding, the floor is smoothed with progressively finer abrasives, cleaned carefully, and finished with the sheen and color you choose.
It is not simply a cosmetic touch-up. A properly sanded and refinished floor can change the look of an entire home while extending the useful life of the original wood. For homeowners who like the character of their existing floors but are tired of the damage or dated color, it is often a better value than tearing out hardwood and installing something new.
That said, sanding is not the right answer for every floor. Solid hardwood can usually be sanded more than once over its lifetime, depending on the thickness of the wood and the condition of prior work. Engineered hardwood may have only a thin top layer, so whether it can be sanded depends on the product. A professional inspection is the sure way to avoid taking unnecessary risks with a floor that has limited material above its core.
Signs Your Hardwood May Be Ready for Sanding
A floor does not need to be completely ruined before it deserves attention. Light surface scratches and a finish that has lost its shine may only need a screen-and-recoat service. But deeper wear often calls for a full sanding.
Sanding may be the right choice when scratches catch your fingernail, bare wood is visible along walkways, old stains remain after cleaning, or the floor has uneven color from sun exposure and area rugs. It is also a good option for homeowners who want to remove a dated orange tone, go darker with a stain, or return wood closer to its natural color.
Water marks require a closer look. Small dark spots may sand out, especially if the damage is shallow. Long-term water exposure, however, can cause boards to cup, buckle, separate, or develop black staining that reaches deep into the wood. In those cases, damaged boards may need replacement before the floor is sanded and refinished.
The Difference Between Recoating and Full Sanding
This is one of the most common questions homeowners have, and the answer can affect both the project cost and the final result.
A recoat refreshes the protective finish without sanding down to bare wood. It works well when the existing finish is intact and the problem is mostly dullness or light abrasion. Recoating is less invasive, but it will not remove deep scratches, change stain color, flatten uneven areas, or correct sections where the finish has worn away.
Full floor sanding takes the surface back to raw wood. It gives you a clean slate for repairs, color changes, and a more complete restoration. It requires more preparation and time, but it is the appropriate process for floors with visible wear, heavy scratches, stubborn stains, or an inconsistent prior finish.
A candid contractor should explain which service your floor actually needs. There is no benefit in recommending a full sanding when a recoat will protect a healthy floor, and a quick recoat will not solve problems that need deeper work.
What a Careful Sanding Process Looks Like
Quality results come from methodical work, not rushing through the job. Before the sanding equipment is brought in, the floor should be inspected for loose boards, protruding nails, damaged sections, gaps, transitions, and areas affected by moisture. Repairs are handled first so the finished floor looks consistent and performs properly.
The crew then sands the main field of the floor, works carefully along walls and corners, and blends those areas so there are no obvious lines or uneven patches. Fine sanding is especially important. A floor can look acceptable from across the room yet show swirl marks, chatter, or scratches once sunlight hits it if the final preparation was not done well.
Dust control also matters. Sanding hardwood naturally creates dust, but professional equipment and careful containment keep the work area far cleaner than old-fashioned sanding methods. Homeowners should still expect some preparation, including moving furniture, removing fragile items, and keeping pets and family members out of the work area while the project is underway.
Once the wood is fully prepared, the floor is vacuumed and cleaned before stain or finish is applied. Every step before that finish goes down affects how it will look. Dust, sanding marks, and missed spots do not disappear under a clear coat.
Choosing a Stain and Finish That Fits Your Home
The right color is personal, but it should also work with the species and condition of your hardwood. Red oak, white oak, maple, pine, and other woods accept stain differently. A color that looks excellent on a sample board may appear warmer, cooler, or more varied across an older floor with natural grain and previous repairs.
Testing stain in an inconspicuous area or on a matching piece of wood helps set realistic expectations. Natural finishes remain popular because they highlight the wood grain and make rooms feel lighter. Medium brown stains can add warmth and help blend some natural variation. Darker stains create drama, but they can show dust, pet hair, and fine scratches more readily in bright rooms.
Sheen is another practical decision. Matte and satin finishes are popular in active households because they tend to hide minor wear better than a high-gloss finish. Gloss can look striking when freshly applied, but it reflects more light and makes imperfections easier to see. The best choice depends on your style, sunlight, cleaning habits, and how the room is used.
When Sanding Is Not Enough
Some flooring problems start below the surface. Persistent cupping or buckling can point to moisture issues in the basement, crawl space, subfloor, or surrounding environment. Sanding boards before the moisture source is corrected can lead to the same problem returning.
Severely damaged boards should be replaced rather than aggressively sanded. Board replacement can also be necessary when pet stains, water damage, or old repairs are too deep to blend successfully. An experienced flooring contractor can weave in replacement boards, sand the entire area, and use stain and finish techniques to create a more unified appearance.
For athletic facilities, the stakes are even higher. Gymnasium floor sanding requires attention to the floor system, line markings, traction, and finish performance. A gym floor needs to look professional, but it also needs to hold up under heavy traffic and support safe play.
How to Protect a Newly Refinished Floor
A fresh finish is durable, not indestructible. Give it the care it deserves from the start. Follow the contractor’s instructions for cure time before moving furniture back, placing rugs, or allowing regular foot traffic. Finish may feel dry before it has fully hardened.
Afterward, use felt pads under furniture, clean up spills promptly, and place quality mats at exterior doors to reduce grit. Sweep or vacuum with a hardwood-safe attachment regularly, because small particles act like sandpaper under shoes and furniture. Avoid soaking the floor or using steam mops, which can force moisture into seams and damage both wood and finish.
If your hardwood has lost its beauty, do not assume replacement is the only path. Diorio Flooring can evaluate the condition of your floor, explain the work honestly, and provide a free quote for a restoration that respects your home. The best next step is a close look at the floor itself – before small signs of wear become repairs that cannot be sanded away.